# Ghost on Heroku. The most complete Guide. (Ever.)
I recently decided to move my blog away from a hosted VM to Heroku. The main reason for this were maintenance costs. Please don’t get me wrong, I loved (and still love) my VM hoster, and if your in need for a lot of custom Software etc. you won’t get around setting it all up manually, but for the needs of my blog, this was a huge overload.
The Key-Situation for this Post is as follow: Whenever I use {this}, I want you to replace it using a Value (you’ll find out what I mean by reading the Text carefully :-))
So I decided to move all my stuff to Heroku, formerly working on my VM instance using a sqlite3 db in production (yeah please don’t beat me) now going to use PostgreSQL, all of this is natively supported by Ghost.
The main issue I’ve come along, in fact, was the manner in wich Ghost stores your uploaded files. Their simple put onto disk and store in the App’s content folder. This might not be a big deal if you’ve got read/write access to your disk, but that’s no the case on Heroku.
I will now, roughly, describe what will be done in the next passage, there’ll be a detailled description later on.
In my eyes, the only valid solution to come along with, was to store all my uploads in a Amazon S3 Bucket. This is pretty straightforward and only requires minimal adjustments on Ghost.
As of now (v0.4.2) Ghost does not have any kind of extension/plugin System, so we’re in need of modifying the App ourselves. There’s a neat little npm-module called ghost-s3 which does (or in fact should do) exactly what we want.
Unfortunately, I’m assuming there has been an update on the AWS-SDK side (which is the only dependency of ghost-s3) I had to make one small adjustment to get it to work with my AWS credentials. But we’ll deal with that later on.
1.
Head over to GitHub and download or fork the v0.4.2 Release of Ghost.
Make an npm install and let npm install all it’s dependencies. Now cp config.example.js config.js and open it using your favorite editor.
Right at the end of your production: { section, you’ll want to add
database: {
  client: 'postgres',
  connection: {
    host: process.env.POSTGRES_HOST,
    user: process.env.POSTGRES_USER,
    password: process.env.POSTGRES_PASS,
    database: process.env.POSTGRES_DB,
    port: process.env.POSTGRES_PORT
  }
},
aws: {
  accessKeyId: process.env.AWS_ACCESS_ID,
  secretAccessKey: process.env.AWS_ACCESS_SECRET,
  bucket: process.env.AWS_BUCKET_NAME,
  region: process.env.AWS_BUCKET_REGION
},
server: {
  host: '0.0.0.0',
  port: process.env.PORT
}
all those process.env.* things will be added as environment variables on Heroku later on.
2.
If you’ve not installed the Heroku Toolbelt then it’s a good time to do so. Now create an App using the Heroku CLI:
$ heroku apps:create myBlog
This command will output your future Blog’s Heroku URL as well as the Git Url which looks like: git@heroku.com:myBlog.git
We’ll add this as a remote to our repo and name it heroku:
$ git remote add git@heroku.com:{myBlog}.git
or to just let Heroku create the App automagically for you:
$ heroku create
Please replace {myBlog} with our actual Blog’s Name.
As we’ll be connecting our Ghost Blog to a PostgreSQL Database, we’ll need to add this as an Addon to our freshly crafted Heroku App:
$ heroku addons:add heroku-postgresql:dev --app=myBlog
This command will return a constant which contains the Database URL, it’s named like HEROKU___POSTGRESQL___{COLOR} the {COLOR}-part must be replaced by your individual value.
We’ll then grab the actual URL by lettings us Heroku show the Config Vars:
$ heroku config -s --app=myBlog
The URL Scheme looks like:
postgres://{POSTGRES_USER}:{POSTGRES_PASS}@{POSTGRES_HOST}:{POSTGRES_PORT}/{POSTGRES_DB}
Remember, those {things} are just placeholders for your actual values. We’ll now want to grab all of them and set them as separate Environment Variables for our Heroku App. To do this, we’ll again need the Heroku Toolbelt:
$ heroku config:add POSTGRES_USER={POSTGRES_USER} POSTGRES_PASS={POSTGRES_PASS} POSTGRES_HOST={POSTGRES_HOST} POSTGRES_PORT={POSTGRES_PORT} POSTGRES_DB={POSTGRES_DB} --app=myBlog
This will promote the config vars to your App, they’ll then be reachable via process.env.{VAR} in NodeJS.
3.
There’s one limitation at Heroku which Ghost can’t handle (at least at the time being) so we’ll need to work around that: Local File Storage, Ghost currently stores all your Uploaded Media inside the content-Folder, which is not possible on Heroku. I’ve decided to use Amazon S3 for my storage purposes. If you’ve got an Amazon AWS Account your’re lucky, If not you can grab one here.
Now we need to make a slight modification to Ghost, to make it work with S3, first take a look at my ghost-aws-s3 Repo at GitHub. We’ll now download and save the s3.js in Ghost’s /core/server/storage-Folder. Assuming you’re still in the root folder of your Ghost App:
$ wget https://raw.githubusercontent.com/kimar/ghost-aws-s3/master/s3.js > core/server/storage/s3.js
should do the job pretty nicely. Now open core/server/storage/index.js and replace Line 15:
storage = require('./' + storageChoice);
by
storage = require('./s3')({
  errors: errors,
    config: require('../config')().aws
});
Congratulations! You’re almost done! The next thing we’ll attend is to create and configure a S3 Bucket at Amazon. Log into https://console.aws.amazon.com, klick Services and select S3. Click Create Bucket and give it a reasonable name, we’ll just call it myBlogBucket select a desired region and click Create. Open the Properties Tab on the right hand side, open up Permissions and Add bucket policy. To let our Readers view the Images we upload, we need to make them readable by public. You can use Amazon’s Policy generator to generate a Policy which suits your needs…our you can just use this one:
{
  "Version": "2008-10-17",
  "Statement": [
    {
      "Sid": "AllowPublicRead",
      "Effect": "Allow",
      "Principal": {
        "AWS": "*"
      },
      "Action": "s3:GetObject",
      "Resource": "arn:aws:s3:::{myBlogBucket}/*"
    }
  ]
}
Please replace {myBlogBucket} with your Bucket’s Name. REMEMBER: All of this Bucket’s contents will be publicibly visible, be aware of that. So be sure to use another Bucket if you’d like to store sensitive data on S3.
It’s time to add an IAM Policy to be able to access the Bucket and PUT something inside :-)
Click again on Services then on IAM on the left hand side: Users then Create New Users. Again, give your User a reasonable name, we’ll use myBlogBucketUser for that. Click Create then Download Credentials. This will add an User to the list, you’ll also retrieve a credentials.csv which contains your User’s Credentials. We’ll need them later on. Now let’s give ’em some rights to write your Bucket. Close that Overlay, if you haven’t done that yet, then click on your myBlogBucketUser-User. Open the Permissions-Tab in the lower part of the Screen, then click Attach User Policy select Policy Generator and click Select.
In the following window, I’ve selected mainly the GetBucket**, ListBucket***, PutBucket*** and PutObject** Actions.
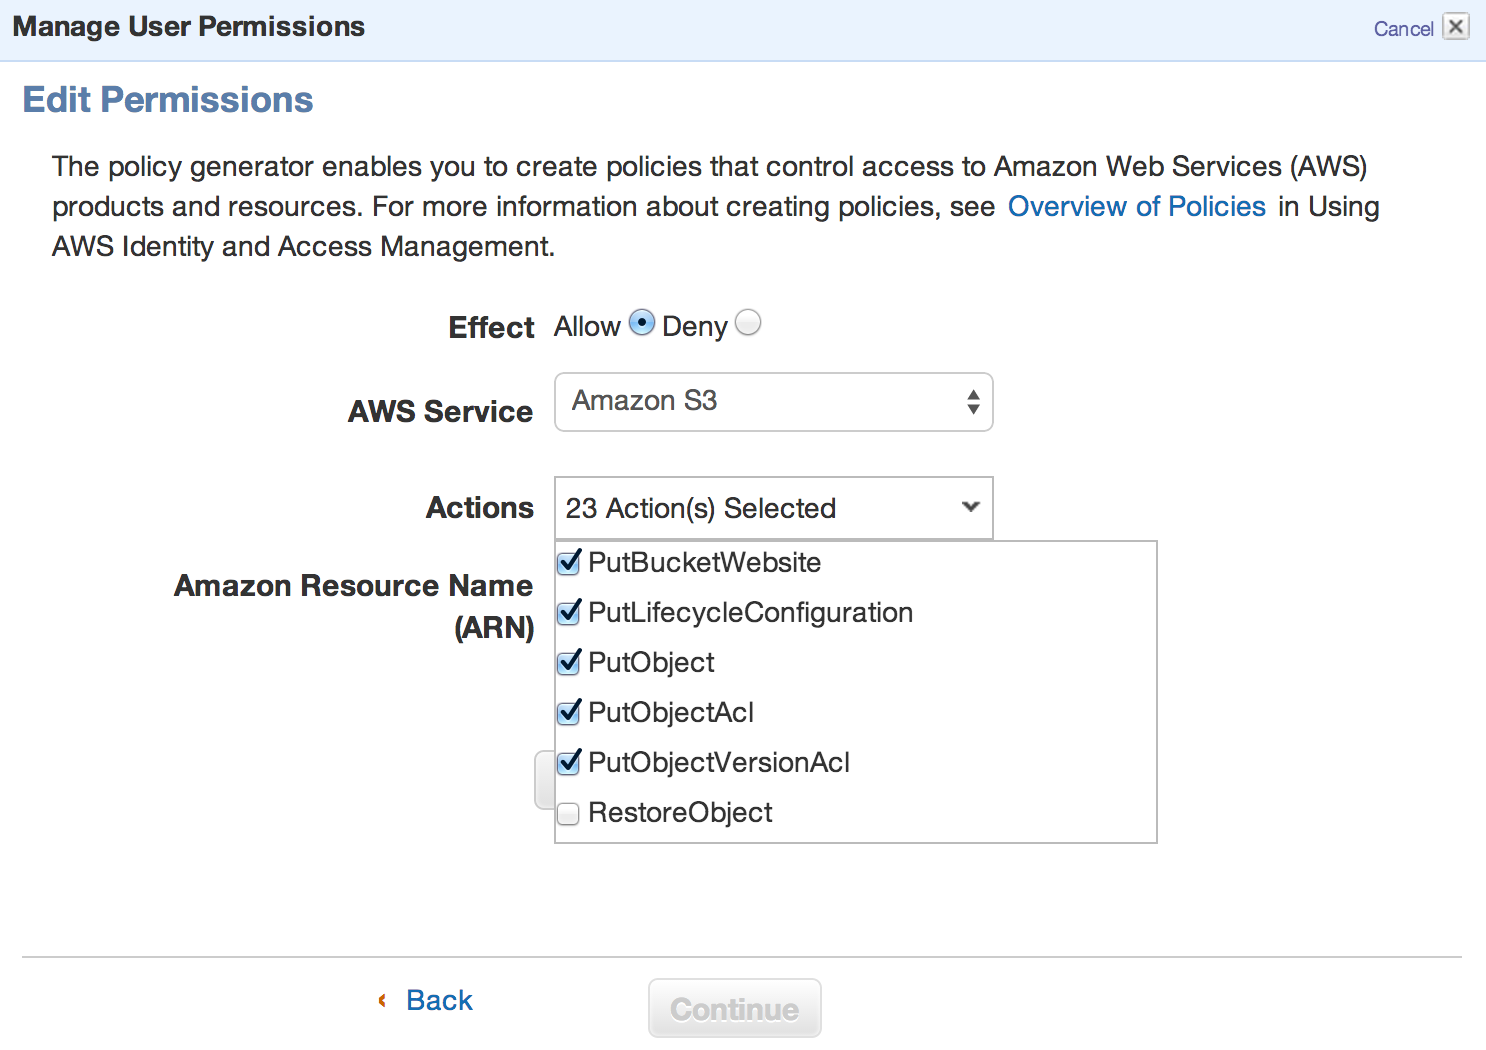
My Policy then ended up looking like this:
{
  "Version": "2012-10-17",
  "Statement": [
    {
      "Effect": "Allow",
      "Action": "iam:GetUser",
      "Resource": "*"
    },
    {
      "Effect": "Allow",
      "Action": [
        "s3:DeleteObject",
        "s3:GetBucketLocation",
        "s3:GetObject",
        "s3:ListAllMyBuckets",
        "s3:ListBucket",
        "s3:PutObject"
      ],
      "Resource": "arn:aws:s3:::myBlogBucket/*"
    }
  ]
}
You could also replace the arn:aws:s3:::myBlogBucket/* by a * to make the Policy effective for all your Buckets.
Now let’s add the User’s Credentials to Heroku, so the App can finally access your Bucket:
$ heroku config:add AWS_ACCESS_ID={credentials.csv: Access Key Id} AWS_ACCESS_SECRET={credentials.csv: Secret Access Key} AWS_BUCKET_NAME={myBlogBucket} AWS_BUCKET_REGION={The region you've selected when creating your Bucket, e.g ireland} --app=myBlog
Assuming you’re still in your Ghost App’s Folder. It’s time to commit your changes
$ git add --all && git commit
and deploy your App to Heroku
$ git push heroku master
Yay! You should be good to go, open up your Heroku Url inside your Browser, browser to /ghost/ and Create your User, everything else should be self explaining, if not, see github.com/tryghost on how to deal with Ghost.
Cheers!